#88 / 13,848' Hagerman Peak

Peak Summary
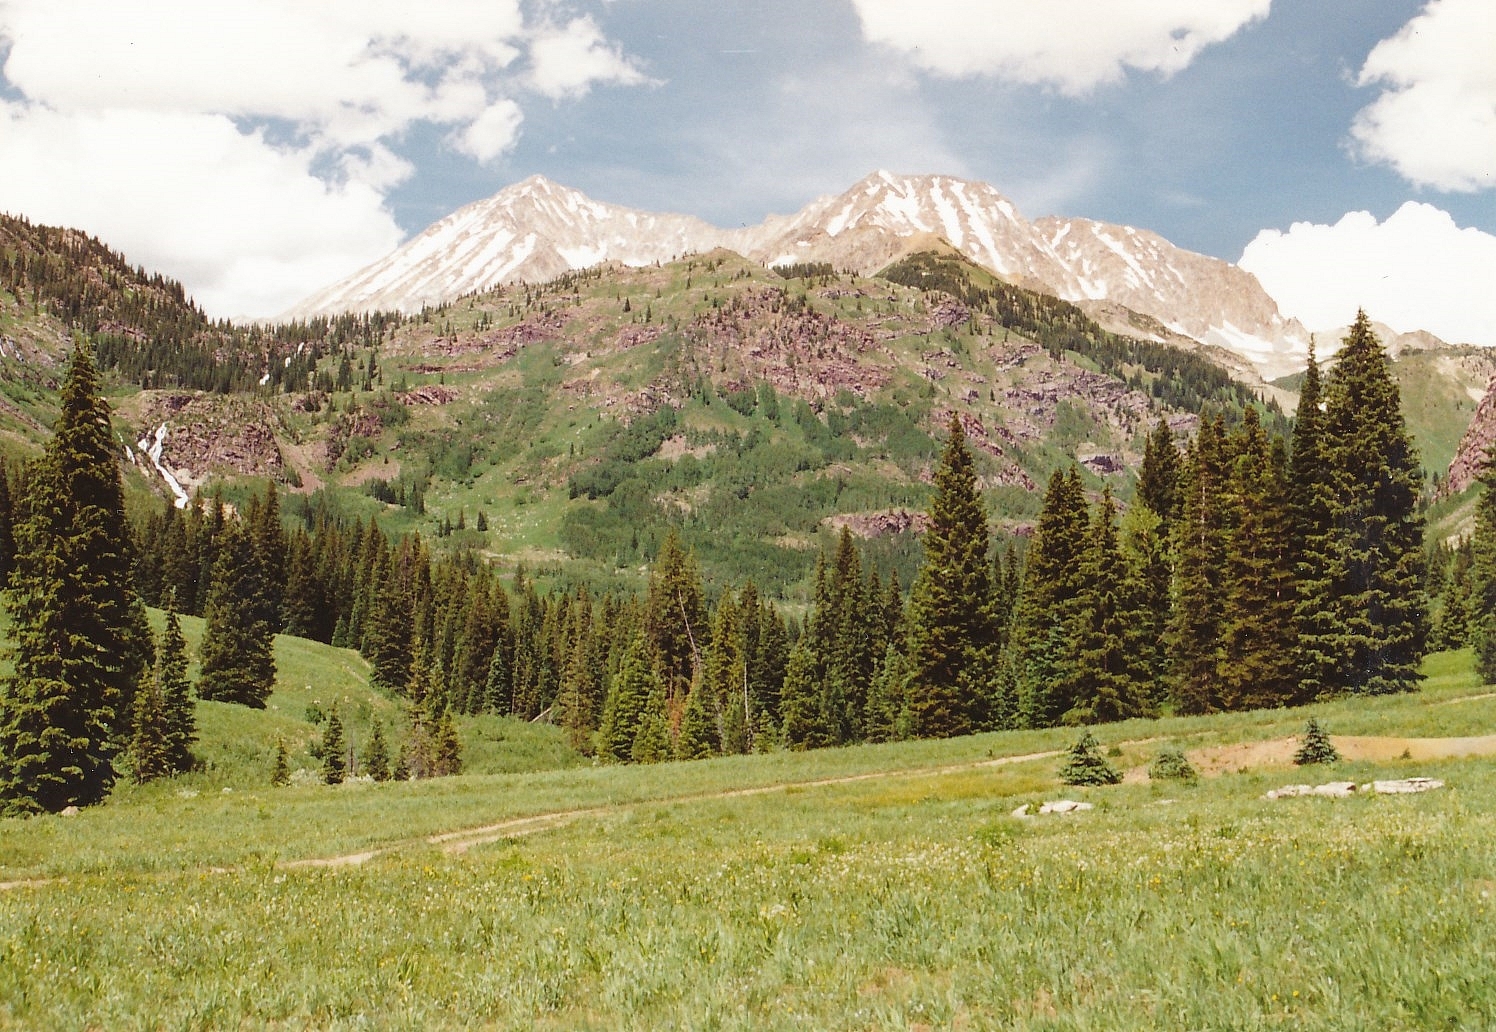
Hagerman Peak is similar in rock conditions to Snowmass Mountain, hence, it's a Class 2+ scramble on largely rocky, broken talus debris via the south face. Reaching this summit requires a 4WD and/or a backpack trip. If you can drive into Lead King Basin, the climb can be easily completed in a day, but the drive in is difficult and often complicated by avalanche damage. A base camp in Lead King Basin or at Geneva Lake offers a short backpacking trip with outstanding Colorado scenery.
Hagerman Peak South Face Gullies Route
-
-
Geneva Lake TH #1973
There are two routes possible we will provide here to take to reach the Geneva Lake TH #1973 located in Lead King Basin. Both begin from the town of Marble.
From the north and the town of Carbondale, drive south on CO133 past Redstone and continue until just under a mile before the highway switchbacks and begins the climb up to McClure Pass. Turn off onto CR3 which continues as a paved road for five miles to Marble. Follow the main road east through town on multiple left-right turns to Beaver Lake. If parking a vehicle, you may be able to do so here.
From the south, take CO133 north through Paonia and Somerset and continue past Paonia Reservoir to McClure Pass. Drive on down the north side of the pass to the bottom of the valley and the switchback. About 1 mile after the switchback is the turnoff for CR3. Drive the paved road east for 5 miles to the town of Marble and continue through town on multiple left-right turns to Beaver Lake. If parking a vehicle, you may be able to do so here.
From Beaver Lake, for either access, continue driving east on CR3, aka: FR314. Pavement ends at the lake, but the graded road continues. At .7 mile measured from the west end of Beaver Lake, the road forks. Take the right fork which heads down between some cabins. The road continues a short distance and then dramatically deteriorates as it begins the climb up Daniels Hill. 4WD will become necessary here. As the hill crests out, come to an intersection of FR 314 and FR 315. (N 39° 04' 29.26" W 107° 09' 32.80") The right fork immediately drops down and begins the rugged drive to the townsite of Crystal. The left fork continues along Lost Trail Creek, climbing a significant amount and then finally drops down into Lead King Basin.
FR315/Lost Trail Creek Road/Lead King Basin Jeep Trail: This road gains a lot of elevation. The road continue east up the drainage. At about 2.5 miles it comes to the first set of switchbacks. There are 6 turns, some of which are very tight. Longer bed vehicles will have some trouble. 1.6 mile farther, the road crosses Silver Creek and shortly beyond there reaches maximum elevation at about 10,800 ft. The road continues another 2.4 miles to the Geneva Lake TH by dropping down on another series of switchbacks into Lead King Basin. There are seven switchbacks this time and again, some may be problematic for longer bed vehicles. The trailhead parking area is about 1,000 feet after the last switchback as you drive south at this point. The trailhead is not paved or even graveled very much. You could possibly vehicle camp here but back up toward the last switchback, there's a good camp area on the east side of the road. This upper road in heavier snow years may remain blocked by snowdrifts and/or avalanche debris. In 2019, it was not accessible until later in August. Inquire with either the White River NF or someone in Marble as to its condition.
For the CR314 access: From the aforementioned intersection, follow FR314 as it drops down, then cross SE on a narrow, shelf section of road where visibility ahead is obscured. Be careful about on-coming vehicles. It may be prudent to sound your car horn while navigating the shelf section to let an approaching vehicle know of your presence. Drive on past Lizard Lake and continue on the rough road across another shelf section as it drops down to join the Crystal River. Once it drops to near river level, the road continues its rugged journey to Crystal. There are usually an adequate number of pullouts if you encounter oncoming vehicles. The route is popular with ATV's, etc. On a few occasions, the road comes very close to the river. In early season runoff, this can be problematic. Again, inquire with White River NF or in the town of Marble before proceeding. There are not any very good campsite locations along the road. In 2019, there was an area of considerable avalanche damage that had been cleared off the road. The going is slow. We measured 3.8 miles to Crystal from the intersection at the top of Daniels Hill. It took about 45 minutes of driving one way. The road is slow and rough but not too bad overall. Most 4WD stock vehicles should be able to make the drive. We would not recommend trying it with anything less than a 4WD capable vehicle with at least average clearance for a 4WD.
A note about the Crystal Mill: This famous and frequently photographed location is just before coming to the village of Crystal. The property is privately owned and the owner(s) charge a fee to cross the fence to take photos, though some photos are possible form the road. There are several places to park in the vicinity.
Once you arrive in Crystal, continue driving east through town. Past town a short distance, the road switchbacks to the left, then to the right. Above the second switchback, there's a place on the right where a couple vehicle can be parked and sometimes this is used as a camping spot as well. Road conditions only get worse from here. In 2019 we managed to park our vehicle here for 3 days. Above this pullout, the road climbs very steeply on a lot of loose rock to a marked intersection. Straight ahead goes to Scofield Pass. Turn left and continue gaining elevation on the still rocky road, but not quite as loose. From Crystal, it's about a two-mile drive into Lead King Basin, to where the road crosses the North Fork of the Crystal River on a sturdy bridge. There are several camping options in the vicinity, several of which are located up the right fork of the road, just before coming to the bridge. To park at the trailhead, continue across the bridge and drive another .3/.4 mile to the trailhead parking area on the right. The trailhead parking is a little south of the trailhead coordinates provided. You can either walk north up the road a short distance to locate the trail or follow a trail directly north out of the parking area to reach the main trail, which is located near below and near the first switchback as the road begins to climb up out of Lead King Basin. Over the years this road has gained quite a reputation for its ruggedness. In some years, the potholes can seem large and deep enough to swallow a vehicle. Breaking an axle is a distinct possibility. There's a long shelf section that is mostly all rock that you're driving on. Beyond there, the road comes to a section of short, sharp, rocky ledges just before entering the basin that could easily blow out a tire. There is a good camp location just before there. In 2019, we were advised not to attempt to drive out Toyota Tundra on this road from Crystal so we parked back on the second switchback and packed in. Having hiked the entire length, we came back convinced we could have driven it. In previous years, we've also managed to get a Jeep Cherokee Sport up this road as well, carefully driven. You've been advised. You must assume full responsibility for any decision you make here. There is at least one outfit in Marble that will drive people into Lead King Basin and retrieve them. We have not used this company but you may want to consider them. Here is the link: http://www.smithfamilycolorado.com/CRJT/jeeptour.htm
Camping
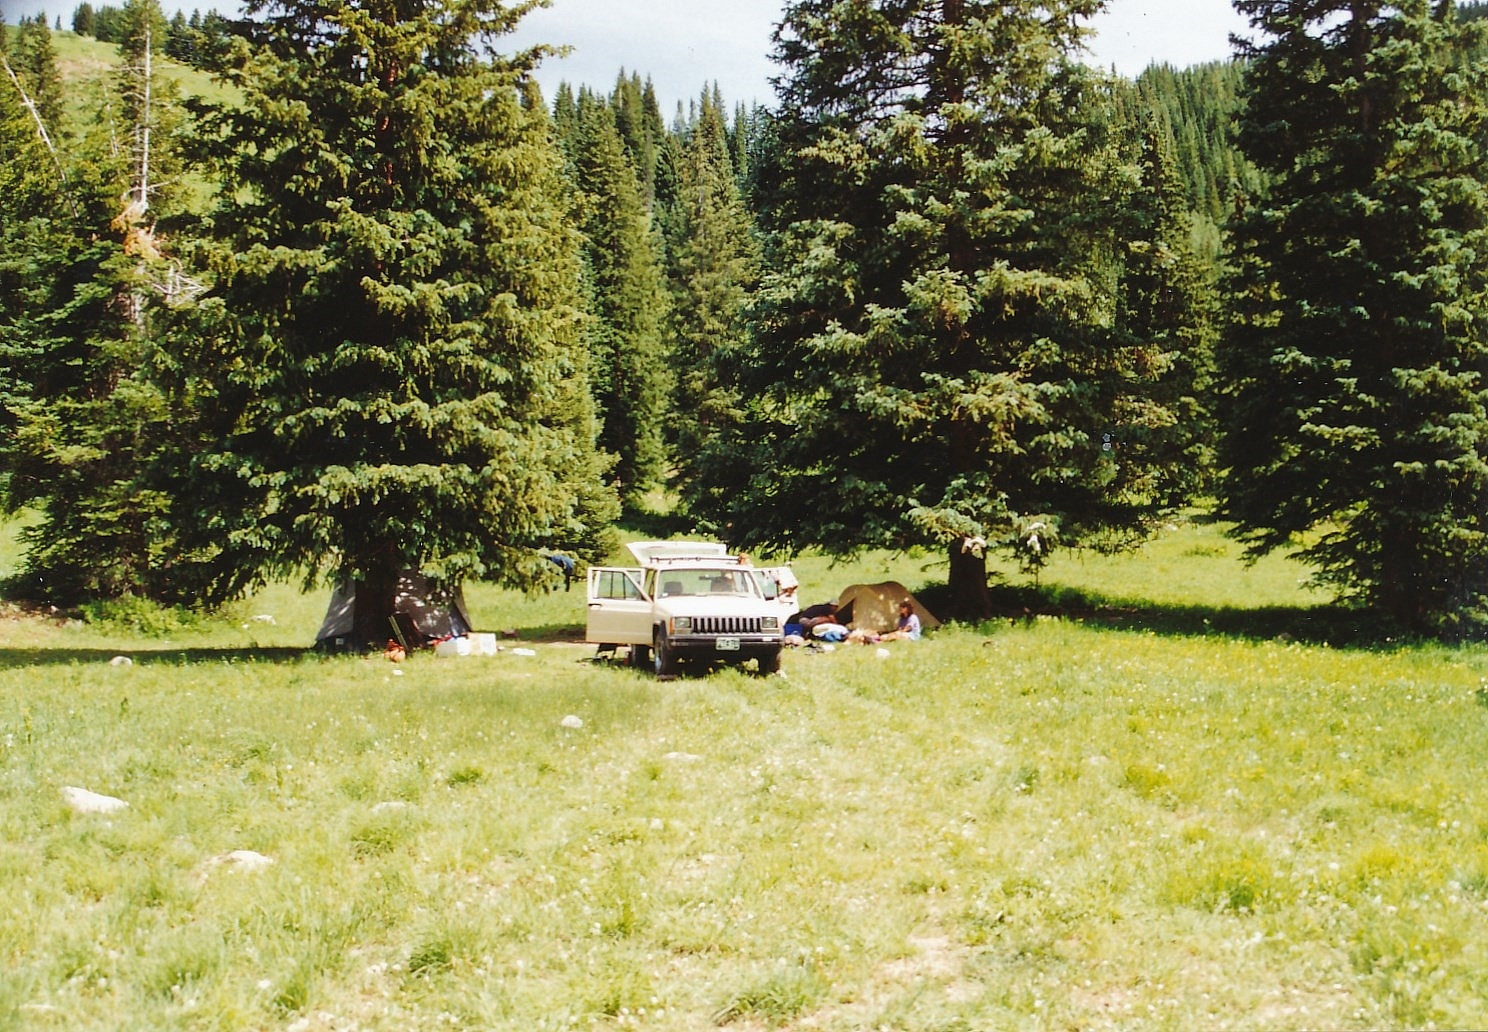
There are several places to camp in Lead King Basin. On the way into the basin from Crystal, there's a good camp area that can accommodate several vehicles. The camp area is in trees and has seen frequent use. See coordinates below.
Once you enter the basin and the road splits, take the right fork and in just a very short distance, look for three large conifers on the right. They make an excellent campsite as well. This road that stays on the east side of the creek continues for a ways with several other possible campsites.
There are designated backcountry sites at Geneva Lake available on a first come- first served basis. There's a total of seven sites scattered around the lake. We were unable to locate site #6. You have to pack in the two miles from Lead King Basin to reach these campsites. They make a good launch-point for a climb of Hagerman, Snowmass Mtn. or Siberia peaks. They are as follows: Campsite 1: West side of lake at N 39° 05' 44.96" W 107° 04' 48.26". Campsite 2 on west side of lake: N 39° 05' 47.64" W 107° 04' 44.86". Campsite 3 close to #2: N 39° 05' 47.76" W 107° 04' 46.20". Campsite 4 - NW of the lake: N 39° 05' 59.87" W 107° 04' 45.64". Campsite 5 north of lake: N 39° 06' 00.29" W 107° 04' 40.97" (approximation). Campsite site we did not locate. Campsite 7 on east side of lake: N 39° 05' 51.56" W 107° 04' 31.05" (approximation).
Campsite Locations
Campsite 1 › N 39° 04' 06.76", W 107° 05' 14.63"Elevation 9,475 These coordinates are approximate.Three Trees › N 39° 04' 22.62", W 107° 05' 14.63"Elev. 9,595 ft.
Click thumbnail to view full-size photo + captionRoute Description
Year Climbed: 1993Note: The estimated mileage provided assumes crossing at the lake outlet. If the trail is taken all the way around Geneva Lake, then the one-way mileage increases to 5.35. From the parking area for the Geneva Lake TH, either walk north along the road to the bottom of the first switchback and then head off to the right to drop down a little to a trailhead kiosk where backpackers can self-register; or from the parking area, follow a trail north that parallels the road on the east side to the same kiosk. Head north up the trail from the kiosk and begin the hike to Geneva Lake. The trail is well-used and generally easy to follow, but tall vegetation borders much of it. The trail heads north for a quarter mile gaining elevation gradually, then turns west to gain more elevation, passing through some avalanche damage as of 2019. Around 10,400 to 10,600 feet, the trail weaves through several switchbacks. Enjoy the distant views of the falls along the stream that drains Geneva Lake. As the trail nears the lake, there are two choices as to how to continue. (If camping at the lake, see our campsite location information in the trailhead description.)
It is possible to cross the lake outlet on a log jam of sorts right at the outlet. (N 39° 05' 41.26 W 107° 04' 47.31") If you choose to do this, once on the south side, you'll need to bushwhack SE up through steep, forested terrain and gain a broad ridge where you'll need to turn east and relocate the trail that comes up from the east side of Snowmass Lake and leads to Trail Rider Pass. On the way up there are some cliffs and rock outcrops to avoid. Once on the broad ridge, the view south looking across Lead King Basin to Treasure & Treasury Mountains is memorable. Here are some coordinates that should get you close back to the trail: N 39° 05' 39.20" W 107° 04' 16.83". If you don't feel that secure navigating your way to this point, then stay on the main trail as it comes to Geneva Lake. Follow the trail north on the west side of the lake, then swings east to cross the feeder stream north of the lake. This may require wading. The trail then heads SE and gains elevation up to the 11,402 point indicated on the USGS map. Follow the trail as it swings around the gigantic south ridge of Hagerman and heads eastward, leaving trees behind to cross a smaller stream that drains the south slopes of Hagerman and Snowmass Peak. (This trail may be taken all the way to Trail Rider pass and then drops down to Snowmass Lake. From the pass, reaching the summit of Trail Rider Peak is an easy scramble along the ridge.)
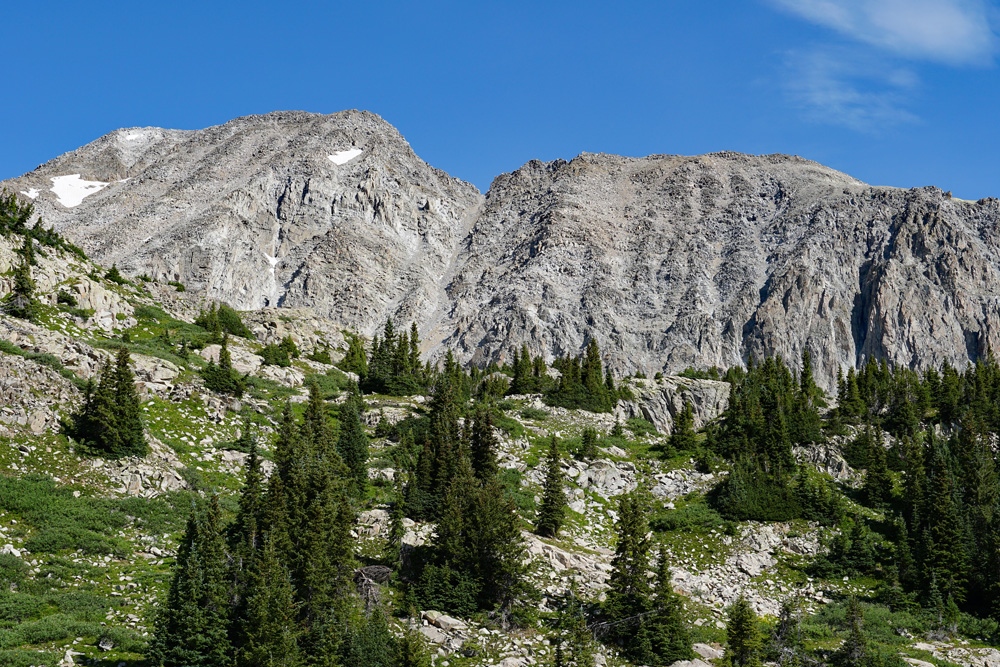
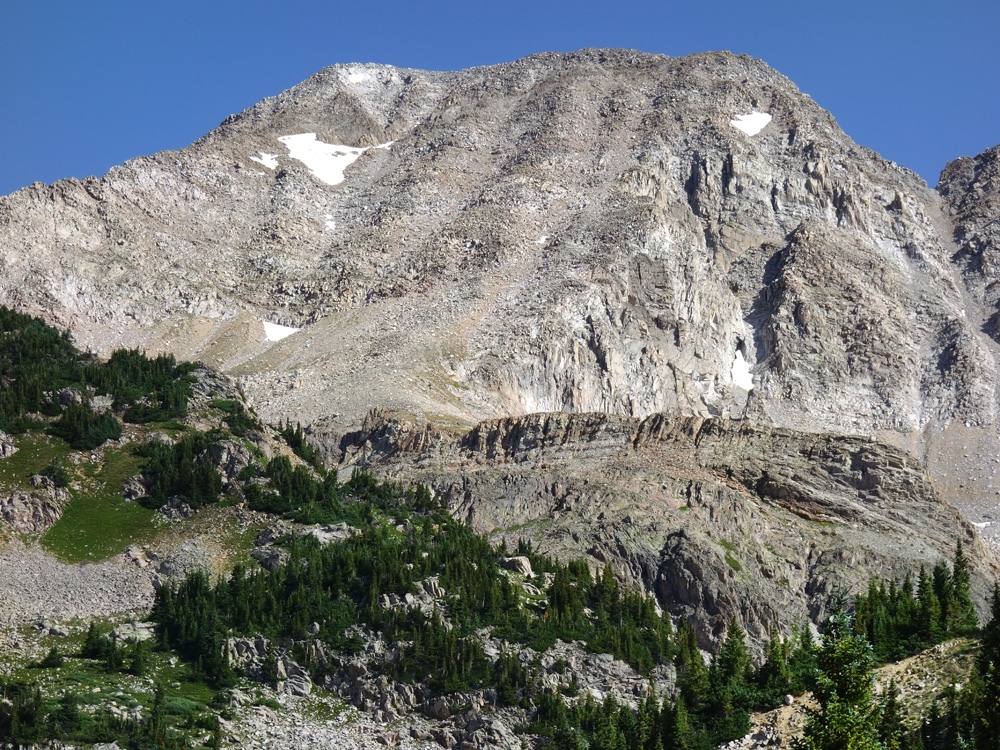
Leave the trail where it crosses the aforementioned stream at about 11,480 ft. Follow the creek drainage north toward Snowmass/Hagerman reaching a large basin at 12,200 ft. (May be snow-filled earlier in the season.) When we climbed this route in mid-July, 1993 (preceded by a heavy snow winter), as you looked at the south face of Hagerman, there were three prominent but shallow couloirs with broad rocky ribs separating them. All three were snow-filled. Choose one of these and head for it. We chose to go up on a rock rib just west of the gully that would lead to the notch between Snowmass Pk. and Hagerman. The ascent was not too steep, but cluttered with large rocks and boulders which required constant crossing back and forth while working our way upward. This is mostly a ruble-fest. If you have either micro-spikes and/or crampons plus ice axe, and ascent in a snow-filled couloir can go quickly and easily.
Arriving on the main summit ridge, hike west to the true summit and enjoy a spectacular view gazing down upon the vast snowfield on the east face of Snowmass Mountain and the often photographed Snowmass Lake. The connecting ridge over to Snowmass Mountain is littered with large, broken blocks and poses a formidable traverse. For the descent, if any of the couloirs are still snow-filled, you can enjoy a rapid and fun glissade, but ice axe is highly advisable to do so. In a matter of minutes, you'll lose a good 1,000 feet. For the remainder of the trip, return as you came.
Additional BETA
Links to other information, routes & trip reports for this peak that may be helpful. -