LoJ: #455 (Pre-LiDAR #465) / 13,237' Lavender Peak

Peak Summary
Note: G&M did not consider Lavender Peak to be a "ranked" summit. Neighboring Mount Moss was ranked. Later measurements adopted by LoJ and Roach now consider the La Plata quad to be missing a contour line for Lavender which in their opinion elevates Lavender to a "ranked" position while Moss is demoted to "unrank." Lidar has basically confirmed this decision, adding 17 feet to Lavender and 2 feet to Moss with a rise of only 231 feet from the saddle.
Lavender Peak is a previously unranked 13er summit that's been elevated to ranked status. Connected by ridge to Hesperus Mountain, Lavender combines well with both Hesperus and Moss. With a moderately difficult traverse from the summit of Hesperus, Lavender offers an interesting Class 3 scramble up through large boulders to reach a split summit. In our route description, we use the same Sharkstooth TH as for Hesperus which is accessible to vehicles with higher ground clearance though the road is passable to most all passenger vehicles to within about one mile of the trailhead.
Lavender Peak West Ridge Route
-
-
Sharkstooth - Hesperus TH
From Durango, CO, drive west on US160 to the small town of Mancos. Turn right at a main and marked intersection and go about .4 miles north, then bear right onto CR42, which later becomes FR561 as it enters San Juan National Forest land. Drive north on this road about 10 miles to an intersection for the "Transfer Campground." The first four miles or so are paved with the remaining 6 being graded gravel. Coordinates for the intersection are: N 37° 27' 58.77" W 108° 12' 38.59". A right turn will take you shortly to the campground, but to reach the Sharkstooth TH, continue straight for another 1.0 mile to yet another intersection where you will bear right. In another .9 mile, you should come to the turnoff for the "Aspen Guard Station." Continue straight east here for another .5 mile, still on FR 561 and turn right onto FR350. Follow this road about 7 miles generally east to another intersection for Twin lakes. Turn right here onto FR346. Drive another 1.6 miles to the trailhead parking area. This last 1.6 miles to the trailhead will become rougher and a good clearance vehicle is advisable, though 4WD is not necessarily required.
Camping
The nearest National Forest campground is the "Transfer CG" about half way in on the drive. Here is the link: https://www.fs.usda.gov/recarea/sanjuan/recarea/?recid=43262. The site has potable water and vault toilet. There are about 12 sites and also a group area that can be reserved.
The remainder of the drive in to the trailhead offers several primitive sites and it's possible to car-camp at the trailhead, but there's little privacy if others are present. There are at least two primitive sites near the Twin Lakes and another primitive site past the lakes on the way to the trailhead.
Campsite Locations
Transfer › N 37° 28' 06.11", W 108° 12' 29.07"8,950 ft. elevation
-
From Hesperus Mountain
Click thumbnail to view full-size photo + caption
Open This Route in a New WindowThe last mile or so to the trailhead is rough and requires higher or 4WD clearance, so keep that in mind when planning this trip. The remainder of the road to that point is okay and maintained well. Tha last mile will slow you down quite a bit.
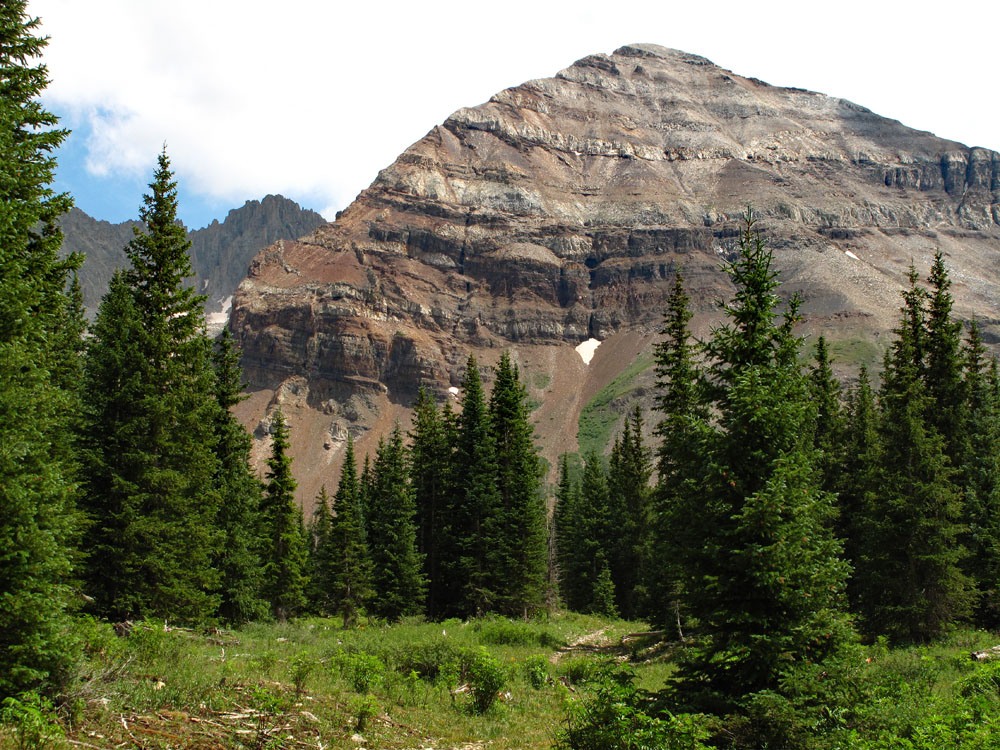
From the trailhead, head SE on the trail, losing some elevation to a crossing of the North Fork of the West Mancos River. The present trail crosses the river at about the 10,700 foot level where the map shows a fairly wide avalanche chute cutting down to the stream. Follow the trail across the stream and then westward across the avalanche chute and back into the forest. Not long after entering the forest, we noticed a couple of rock cairns along the trail leading up on the left (south). If able, locate and follow a faint trail through the wet undergrowth heading uphill toward Hesperus. The faint path led us into a very minor drainage that we followed for a short time before exiting to avoid some willows. This exit took us over (SW) to a rubble field that we crossed and then aimed for more open terrain up ahead. Along the way we found some nice slopes covered with Columbine and other assorted flowers which we stopped to photograph.
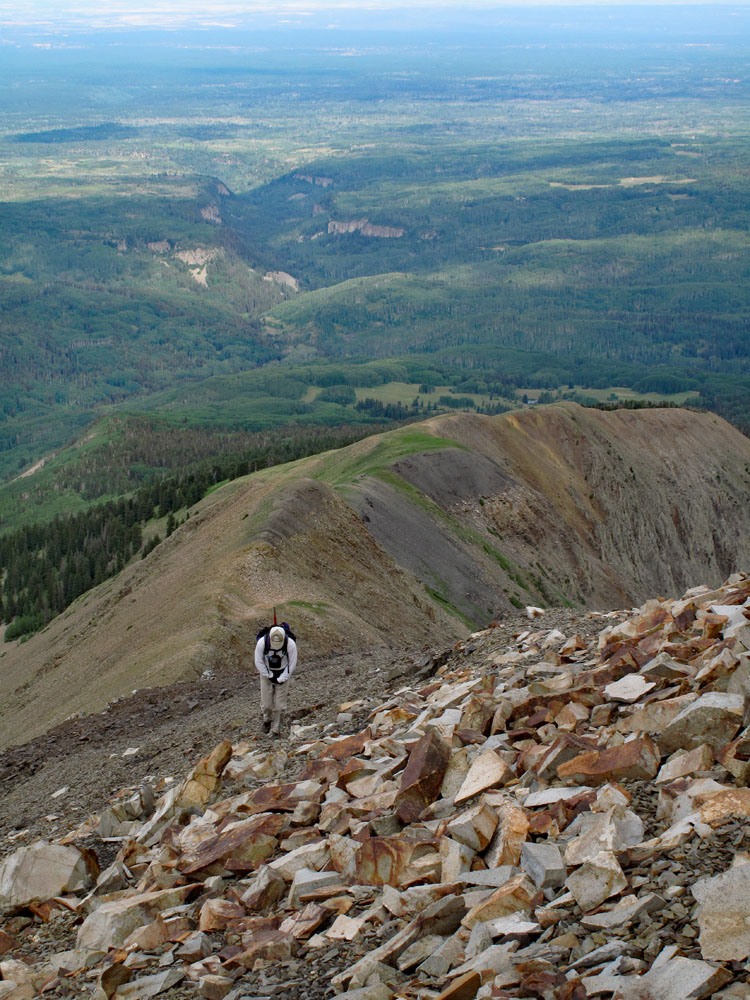
Our route on up the mountain took us a little west of south, aiming for the west ridge of the peak at a saddle along a more flattened portion of the ridge at just below 12,200 ft. Gaining this saddle involved some steep rubble scrambling for part of the time. At the saddle, the tundra on the lower ridge ends and from this point on, you will be hiking on fairly small and loose rubble. As you ascend the west ridge, there will be some short cliff bands to surmount. These never presented any real difficulty but did offer a little fun.
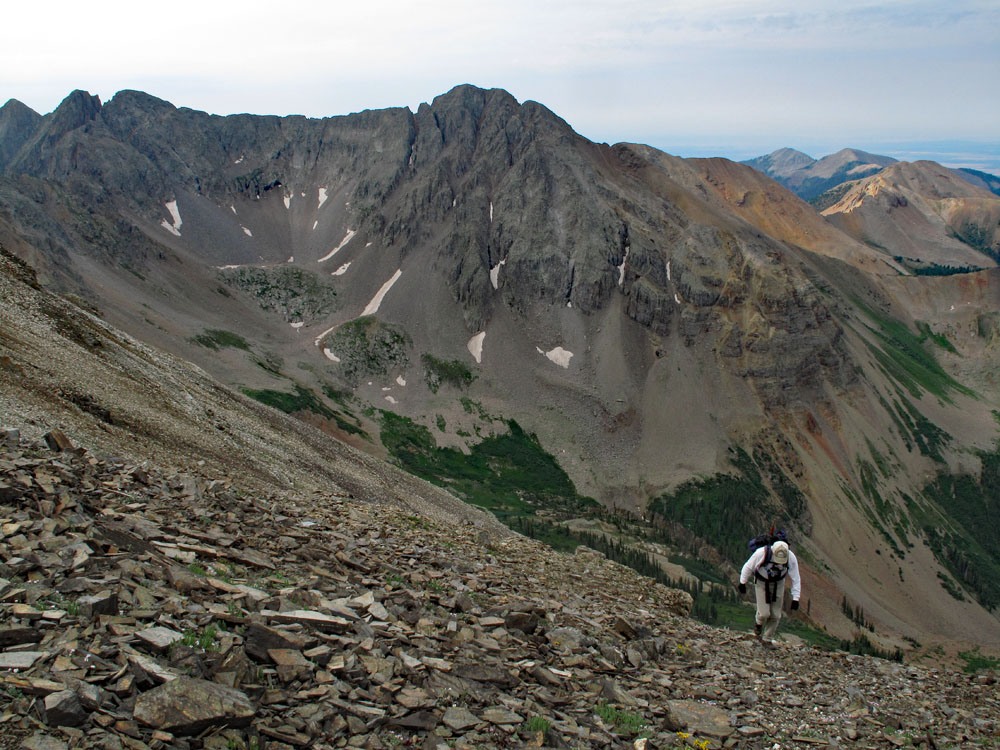
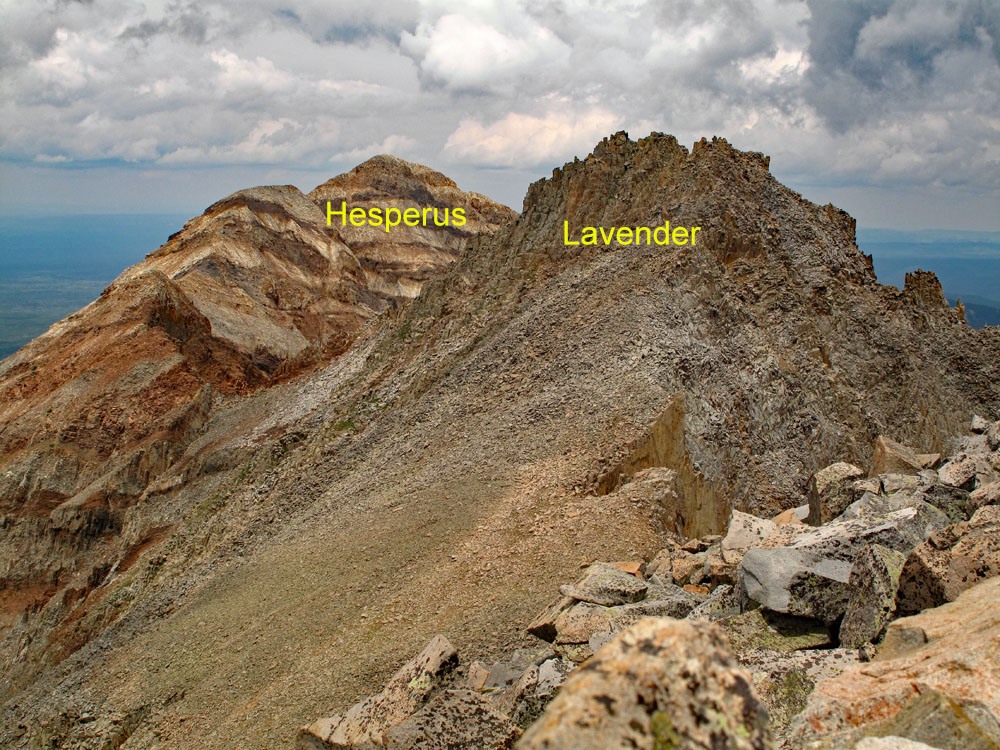
Keep following the ridge eastward over all kinds of loose rubble to the summit. We crossed a few more very minor rock bands, all of which were easily bypassed. The summit affords a nice view of the connecting ridge over to Lavender & Moss. Trip accounts we had read on the internet made it sound like a traverse over to those two summits would be difficult, but if you've reached this summit early, consider a traverse on over to Lavender & Moss. It will be worth considering because it's not all that difficult, however, you don't want to be caught in inclement weather on this traverse. For us, the weather was cloudy/overcast, but stable, so we decided to try and go for it and if the weather caught us, we felt we could exit to the basin south of Hesperus and contour back across the west ridge and head back to the trailhead.
Click thumbnail to view full-size photo + captionRoute Description
Year Climbed: 2012Lavender Peak is sequenced with both Hesperus Mountain and Mount Moss. One way mileage and elevation gain are measured from the summit of Hesperus. Round-trip mileage and elevation gain assume completion of the sequence.
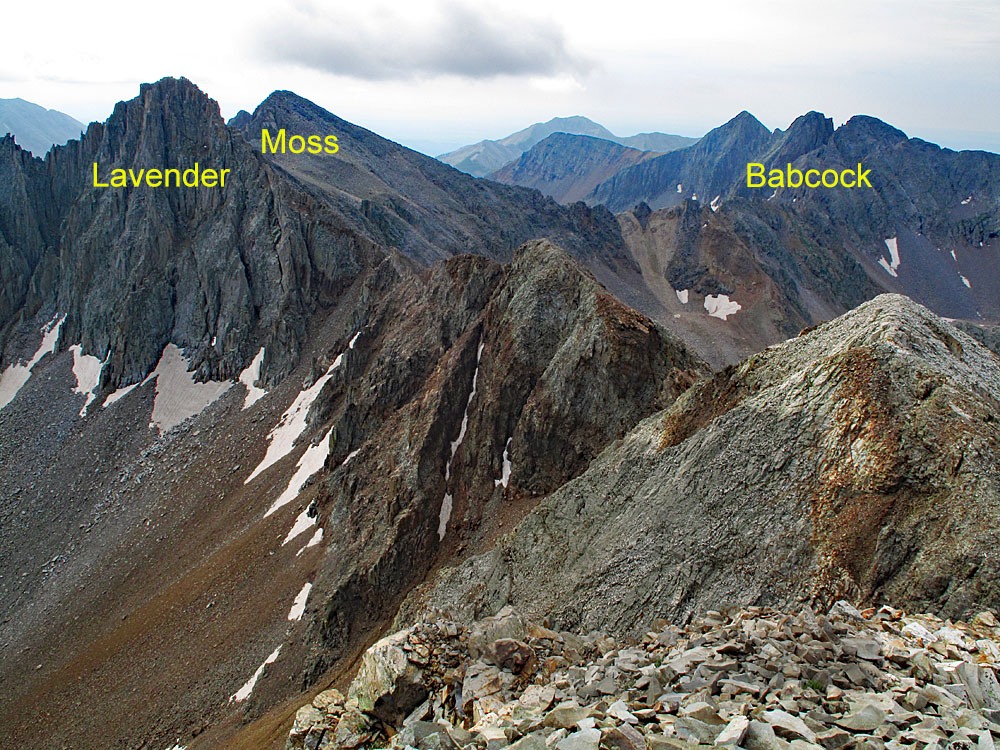
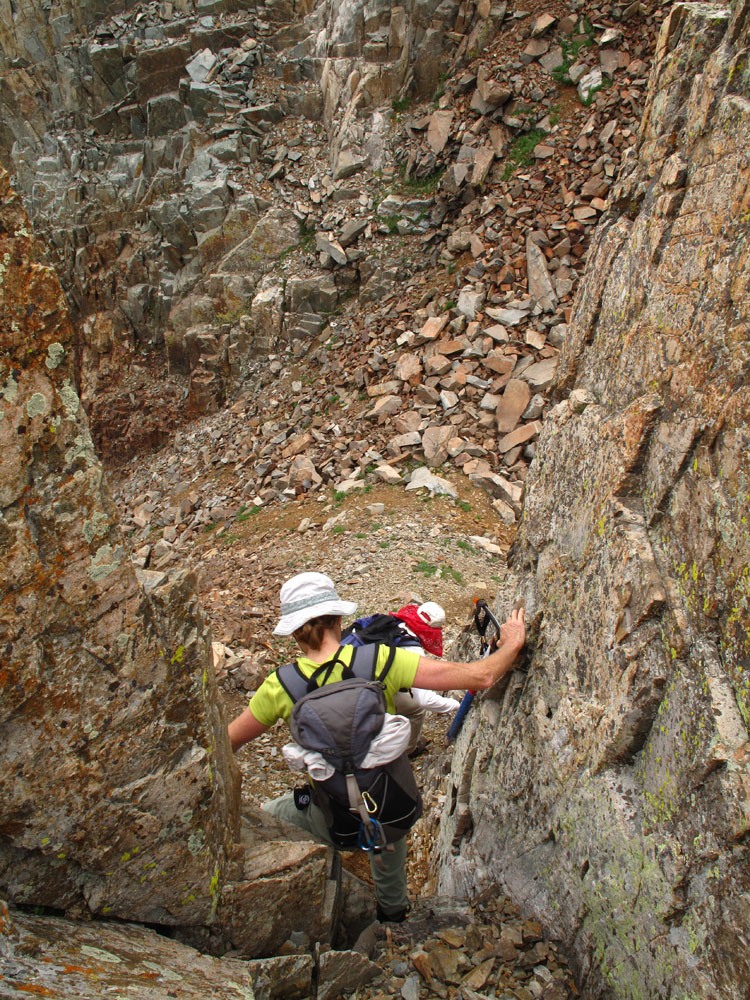
Begin your traverse from Hesperus to Lavender by heading down to the southeast from the Hesperus summit on some fairly loose talus. The first prominent notch just south of the Hesperus summit is easy to get around. Below it, descend 200 feet to find good access across all the rubble as you swing more easterly toward Lavender. Some infrequent cairns may indicate you are on a previously used route. Continue the contour on the south side of the ridge and you'll have to cross 3 other gullies. The next two are passed on the south side and the third, we crossed a little on the north utilizing a dicey little snow patch, but this saved a drop to the south of at least 100 feet. After crossing the third, ascend a steep chute and then begin contouring below the summit of Lavender. At one time, Moss was considered the ranked summit of this pair of peaks, but more recently, Lavender has achieved the ranked status and Moss is now considered a “soft rank.”
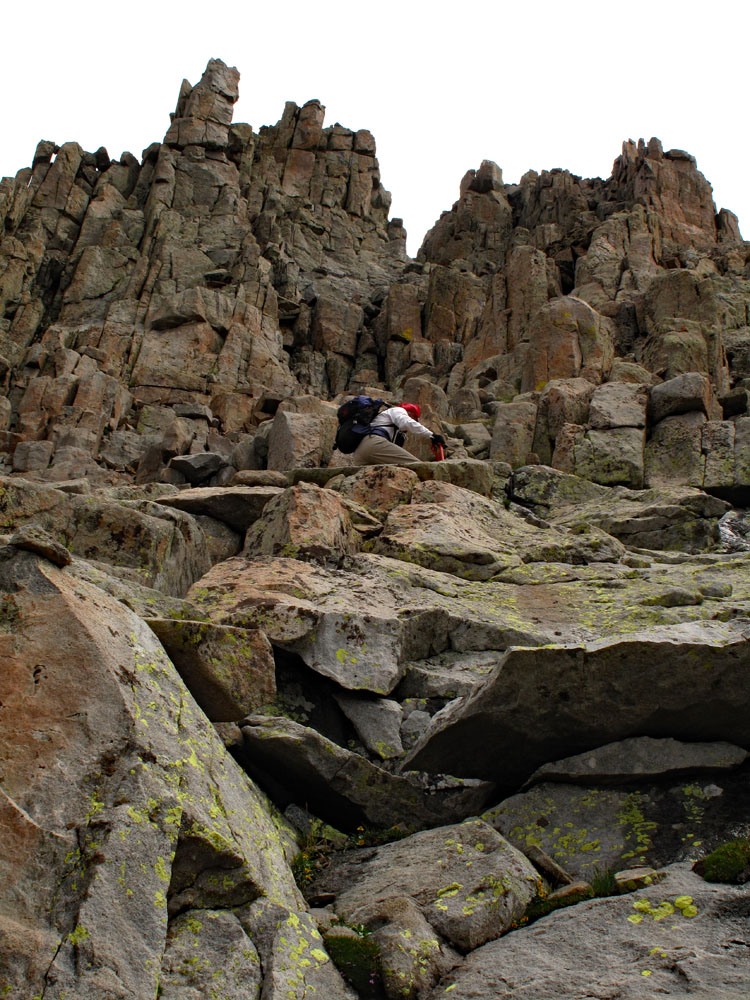
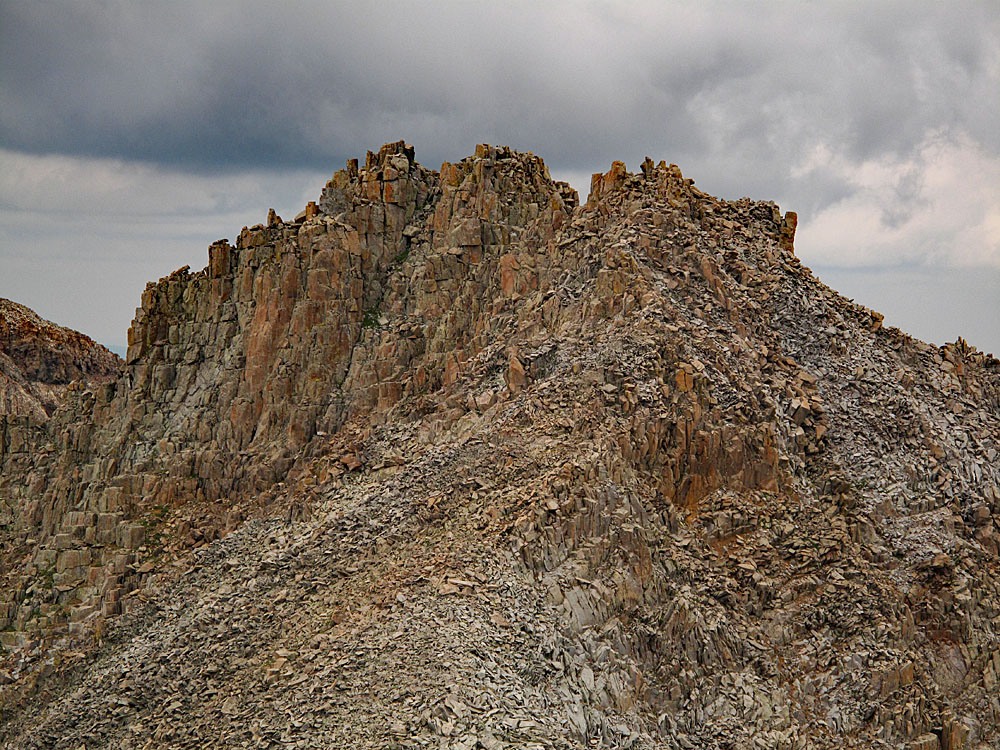
Once you feel you have contoured to a position below the split summits of Lavender, begin your ascent. Scramble up a steepening, narrow gully, on solid rocks and great blocks toward the split summit. We encountered 3rd and perhaps 4th class terrain (with minimal exposure) as we climbed first to the west summit and then crossed over to the east or middle summit. (Because of the near 4th class terrain, some rate Lavender as Class 3+.) There’s a third summit farther east, but it is definitely lower, whereas the other two are almost equal. All in all, though the traverse over from Hesperus is on a lot of loose and difficult rock, it is not technically difficult and goes more quickly than anticipated. From the Lavender summit, you can easily scout out the traverse on over to Moss if you choose to continue.
Additional BETA
Links to other information, routes & trip reports for this peak that may be helpful. -