LoJ: #431 (Pre-LiDAR #423) / 13,264' "Crestolita" Formerly UN13270

Peak Summary
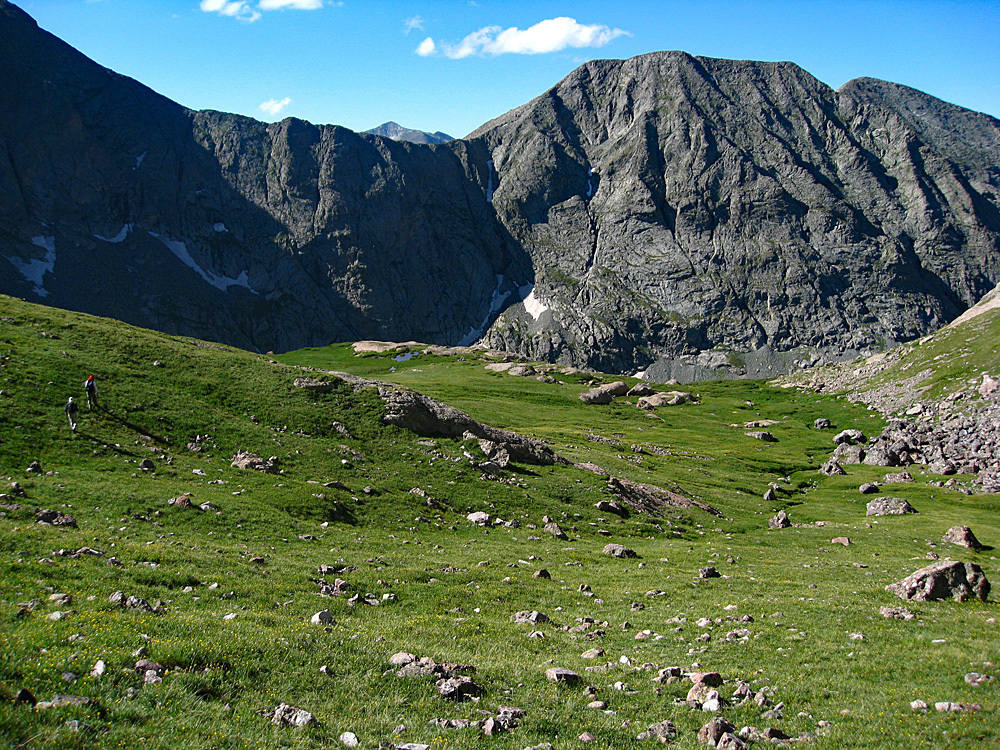
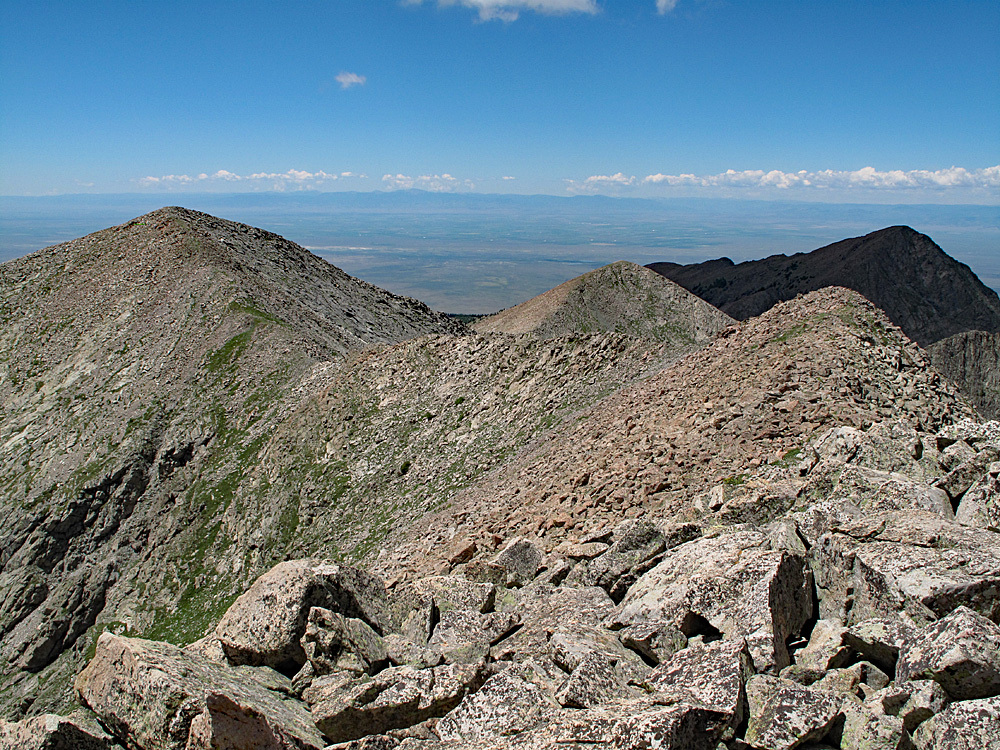
A short but entertaining little Class 2+ and/or Class 3 peak, easily added to a day that includes Broken Hand Peak and perhaps UN 13,028 (previously 13,020 B) as well. Easily accessed from Broken Hand Pass. Passenger vehicle with better than average clearance advised to reach the end of the South Colony Road or 4WD where it crosses South Colony Creek. While Lidar reduced its elevation by 6 feet from 13,270, it still retains a ranked status.
Crestolita North Face Route
-
-
South Colony TH
From the town of Westcliffe: Drive south on HWY 69 for 4.5 miles and turn right onto Colfax Lane (CR119). Proceed about 5.5 miles on this partially paved and graded dirt road to an intersection where you must turn right or left. Go right (west) on CR120 and in about one more mile, if in a low clearance passenger car, park at a fence line. This is referred to by some as the "lower trailhead." If you have a better clearance vehicle (CRV, Outbacks or better) with care you can drive another 2.5 miles to the "upper trailhead" close to and before where the road crosses South Colony Creek. This last 2.5 miles has deteriorated significantly over the last few years. The Forest Service has put in a parking area here that they say can hold about 50 vehicles. On summer weekends, you may find even this amount to be insufficient. Also, the FS has considered introducing a "use fee" of $20, however at the date of this writing, the idea appears to be in limbo. Best to go prepared, however. From the parking area, a bridge takes hikers over South Colony Creek so no need to prepare for wading.
Camping
On the 2.5 mile drive into the upper trailhead, there are some at-large spots available and then at the trailhead, the FS has installed 4 - 5 camp spots that have tent platforms and fire rings. There is presently no fee for using these spots. Wag-bags are supposed to be available from a dispensary of some kind to help with the human waste problem. There are no vault toilet facilities. Here's a hint for those peakbaggers spending multiple days in the Westcliffe area and in need of a shower: The Westcliffe Inn, a little south of town on HWY 69, may offer use of their showers for a small fee. We last availed ourselves of this in 2009. Stop in and inquire if they are still open.
Campsite Locations
South Colony Creek › N 37° 58' 34.74", W 105° 30' 20.75"
-
From South Colony TH via Upper South Colony Trailhead & "Formerly UN 13020 B":
-
UN13028 NW Approach Class 2+ / 4.6 mi / 3,280’ One-Way
Click thumbnail to view full-size photo + caption
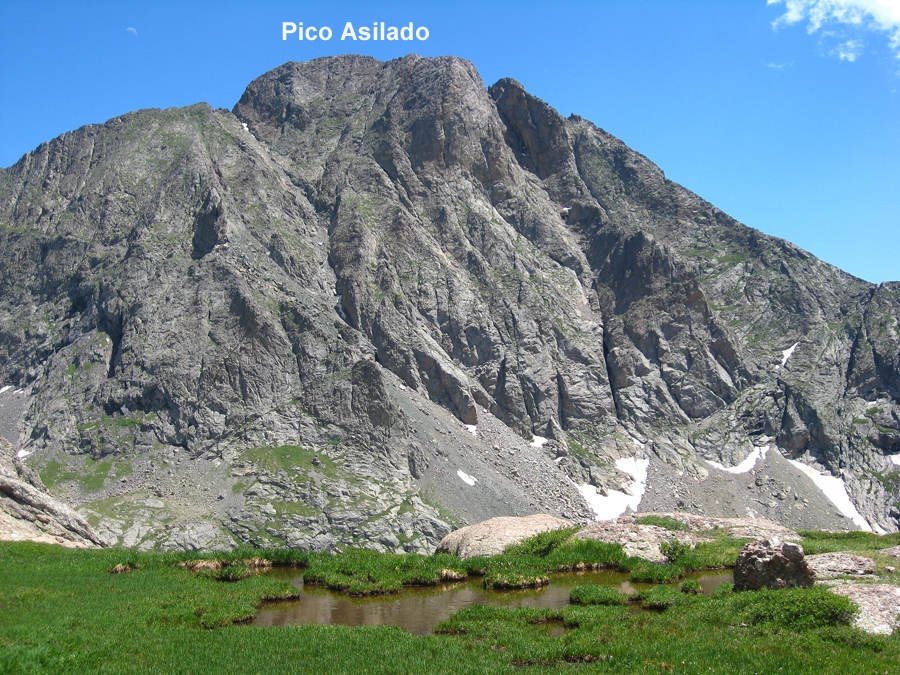
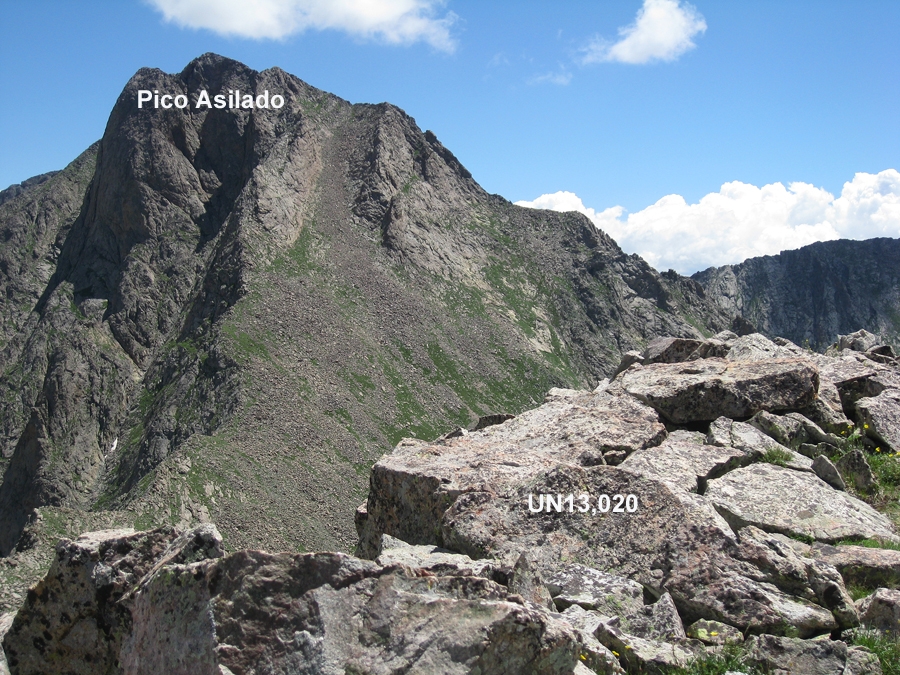
Open This Route in a New WindowNote: UN13,028 would be an easier and shorter climb if combined with Milwaukee and Pico Aislado on a backpack trip to the Sand Creek area. Unfortunately, when we climbed those other two summits in 1995, we were not even considering going on to climb all the 13ers, leaving UN13,028 as a "hanging or orphaned peak" as we call them. This required us then to find another route and so it made the most sense to us to combine it with our climb of Crestolita. There is an excellent description of the Milwaukee/Pico/13,028 climb on LoJ by looking under any of those peaks. The traverse from Pico Aislado to UN13,028 is described as Class 2. We have included a photo in the UN13,028 gallery of the connecting ridge for those considering an approach from Pico. If using that approach, we would recommend the return route also described on LoJ that drops you off UN13,028 to the small lake WNW of the summit and dropping down into Cottonwood Creek, locating the trail that returns one back east to "Milwaukee Pass" and then returning to your starting point in the Sand Creek drainage.
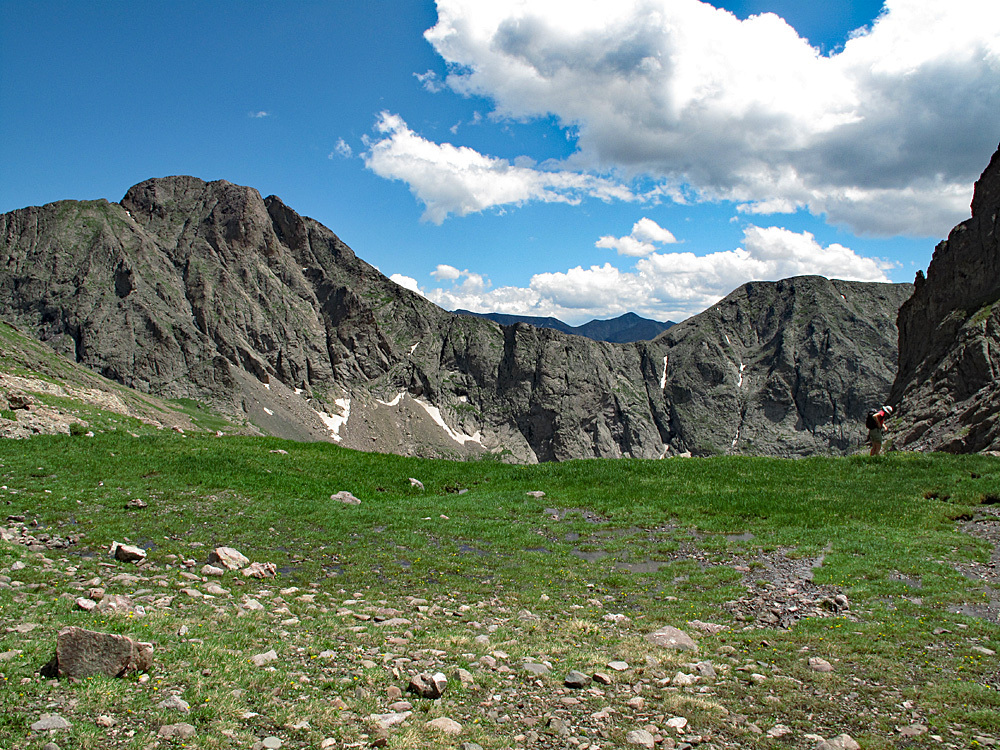
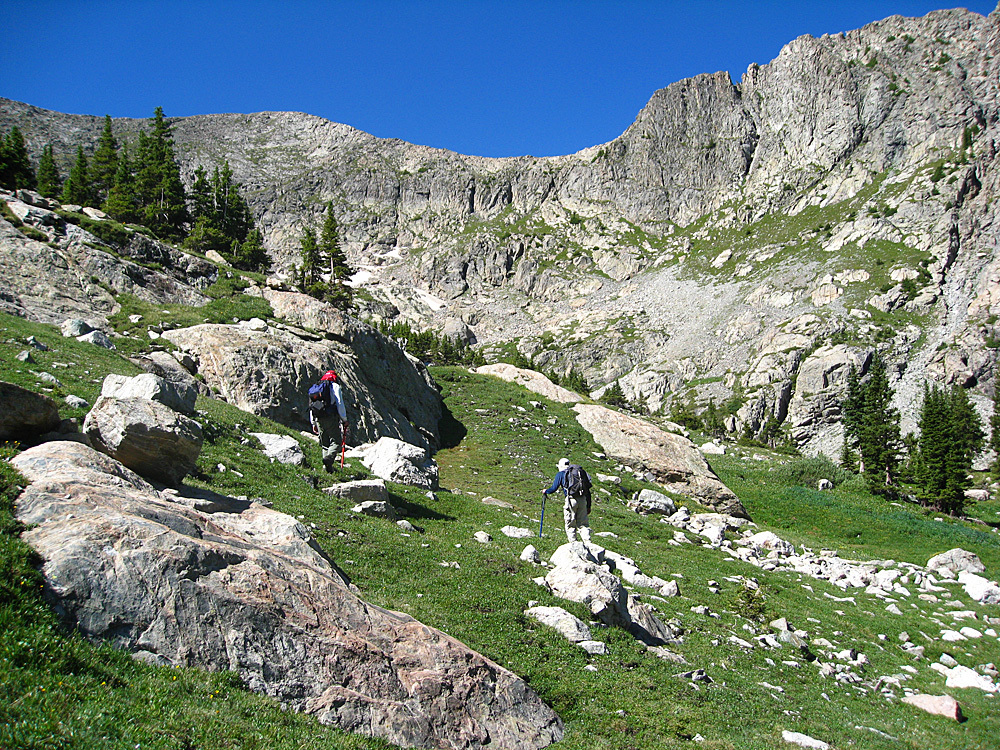
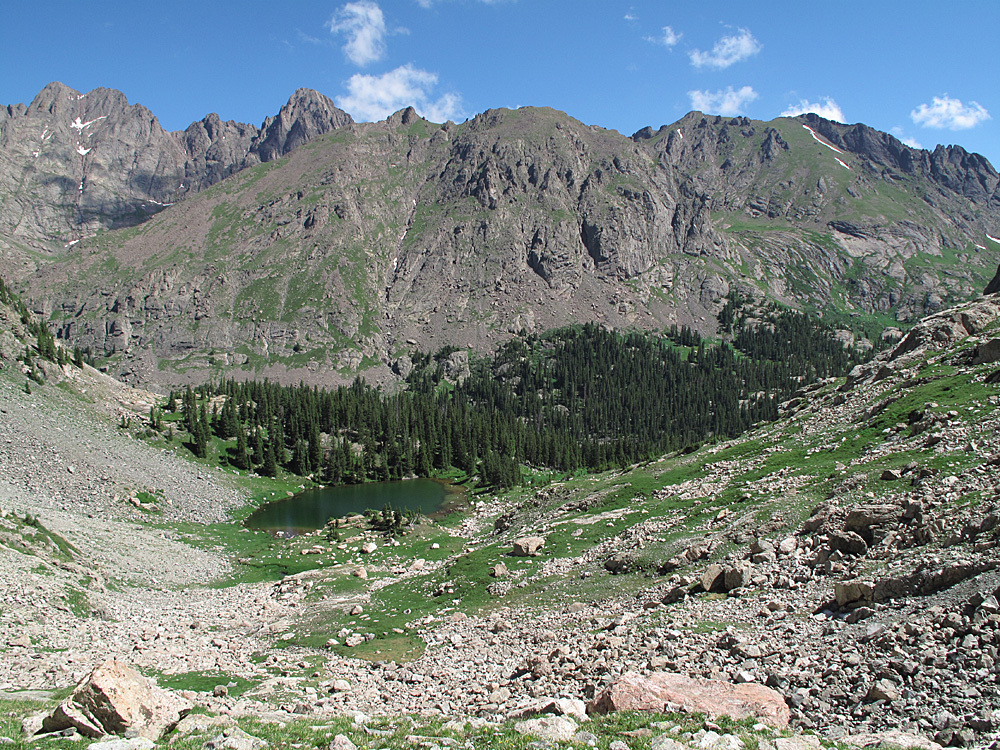
Route from Broken Hand Pass: From the end of the access route at 11,000 ft on South Colony Creek, follow either of the two trails to South Colony Lake and proceed up the trail to Broken Hand Pass as described for Crestolita. From the pass, drop about 200 feet in elevation on the trail to Cottonwood Lake and watch for a trail to the left (south) that contours over to the Broken Hand/Crestolita saddle. (Alternately, if climbing Broken Hand, drop straight from the summit to the same saddle on mixed tundra and scree and rock.) Enjoy the amazing view of Crestone Needle from this saddle. From the saddle, continue south on lush grass and tundra losing about 350 feet elevation to a flat, marshy area with several reflective, small tarns. From this location, obtain a view down into Cottonwood Creek below and aim for near the last group of trees you see and for a break in the willows surrounding the creek. From the tarns, begin a steeper descent punching your way through willows and dense evergreens, avoiding short cliffbands and rocky outcrops as best you can, while dropping down steep chutes at times. Cross the creek near a beautiful waterfall on some large boulders and once across, contour somewhat uphill for half a mile to the small but beautifully situated lake at just above 11,800 ft., WNW of the UN13,028 summit.
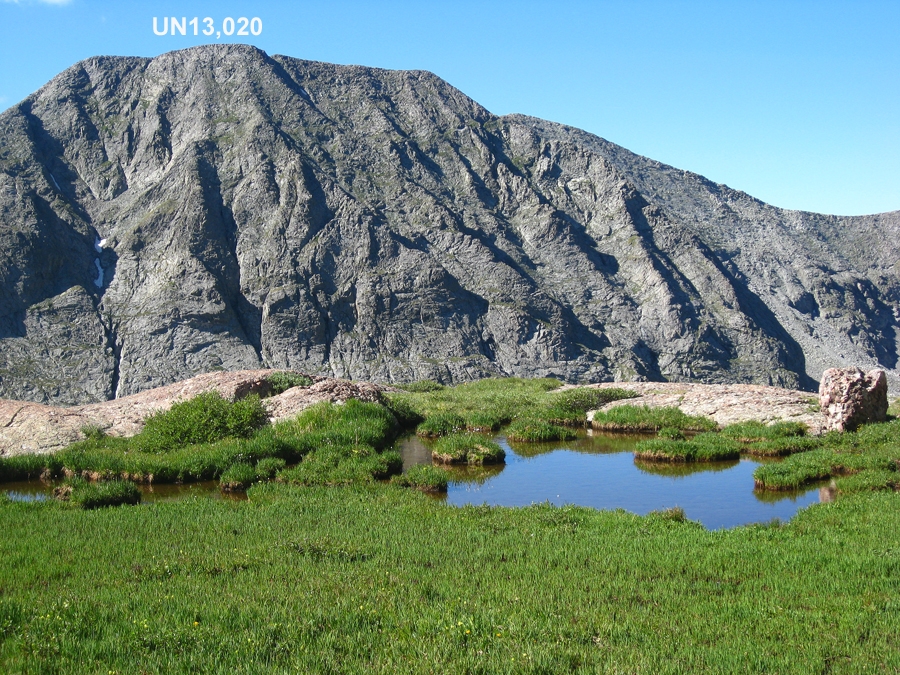
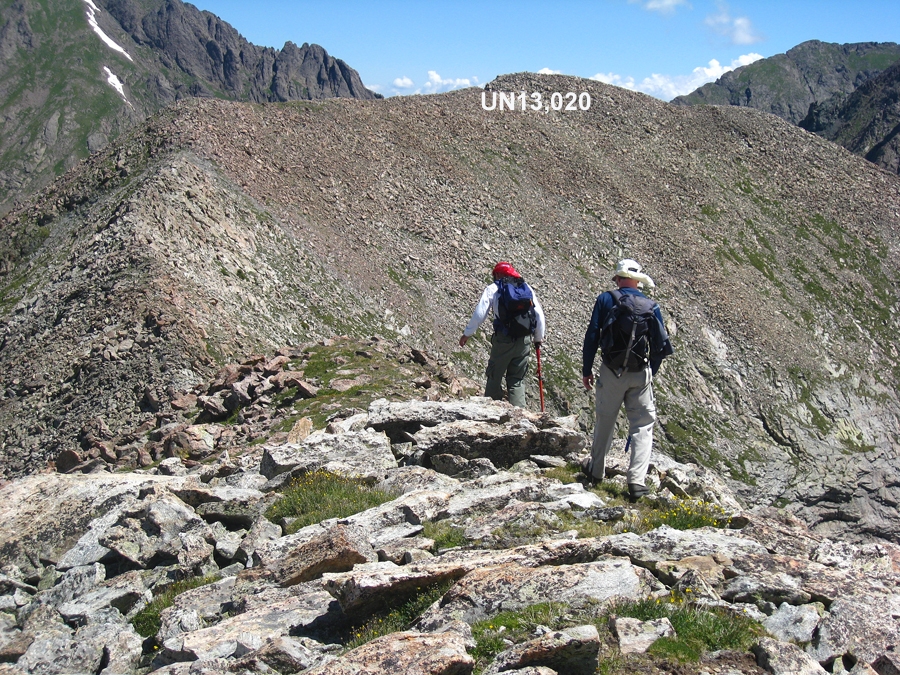
From the small lake, we had first assumed we would have to climb more directly south to the saddle between the 12,795 point and 12,989. But as we headed that direction, we found a series of tundra benches that led us upward, first SE, then east toward the ridge north of the 12,989 point. The benches led to some steep tundra ramps and higher up the tundra finally gave way to rubbly rock. Once on the main ridge, easily walk NE, then east over broken rocks and rubble to the summit. Enjoy an amazing view of the Crestones, Crestolita, Pico Asilado, Music Mountain, etc. To return, basically reverse your route. Doing this summit alone will require nearly 4,600 feet in total elevation gain for the day. Combining with Broken Hand and/or Crestolita will possibly add another 1,000 ft.
-
Route Description
Year Climbed: 2009There are two possible approaches to the summit we'll provide here:
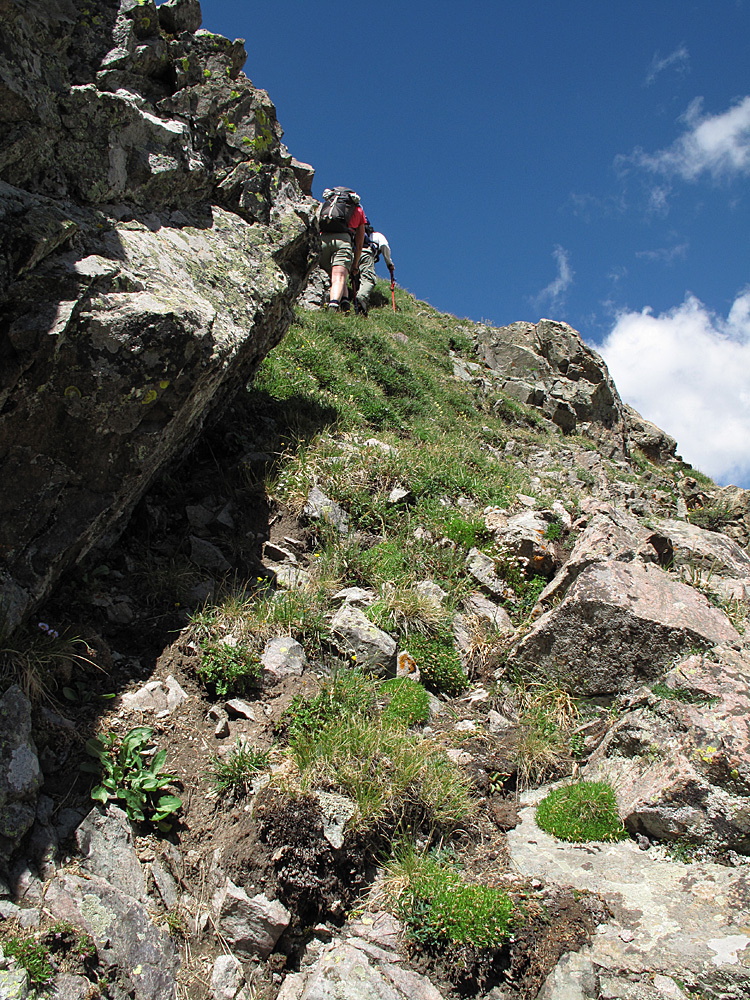
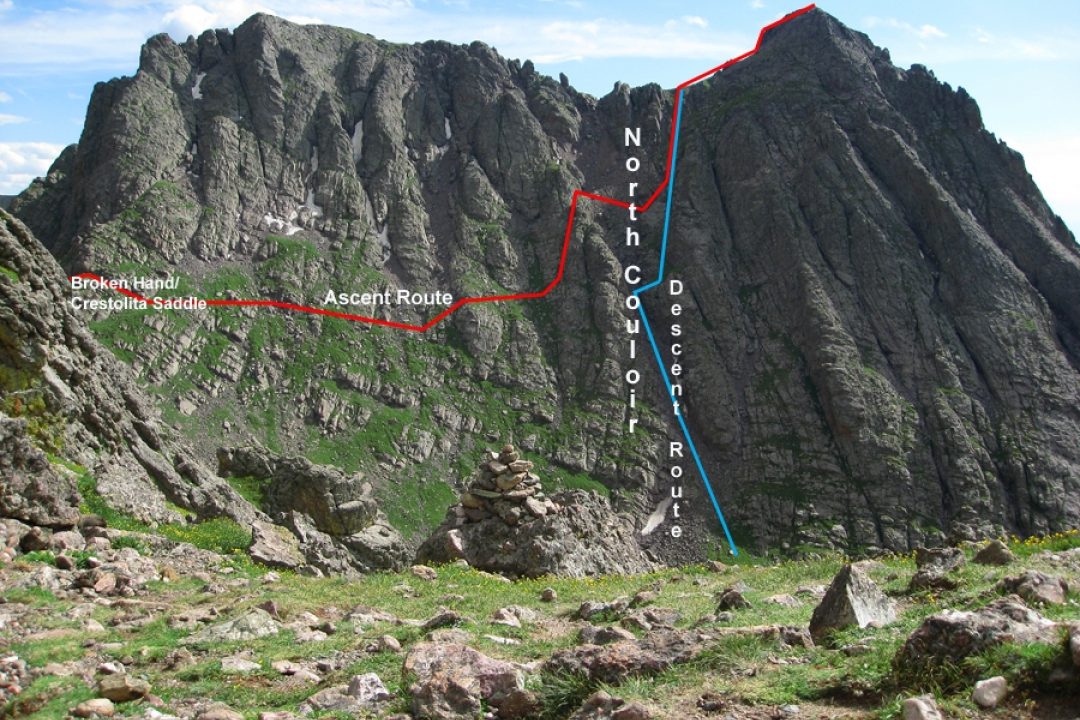
1. If you're coming from the summit of Broken Hand, descend to the Crestolita/Broken Hand saddle just below 12,800 ft. If returning back from UN 13,020 B, go back to the same pass. From the saddle, proceed to contour west across the north face of Crestolita on primarily tundra and tundra ledges with embedded rocks until you arrive at the large couloir that splits the north face. (When you first arrive at Broken Hand Pass, it will be helpful to make note of this couloir.) At the edge of the couloir, you'll probably find access into it blocked by steep, rocky drops. Also. much of this side of the couloir is flanked by a prominent rock rib. Climb up the rib along the left side of the couloir utilizing a steep, narrow, tundra gully watching for a reasonable access down into the main couloir. We found such access after gaining about 100 vertical feet. It was a small and not very wide ledge that led us into the couloir over about 40 feet. (3rd class) Once in the couloir, you'll need to navigate through the steep, loose boulders and rocks to cross to the other side. Since this is all north facing, the earlier in the season, the more likely it is you'll encounter snow and/or ice. An ice axe could be handy for a short section. Once across the couloir, scramble up and out onto the other side and begin your final ascent to the ridge above on a very steep mix of tundra with embedded rocks and some loose rock and scree. Hopefully you'll find that you are above a prominent rock rib that delineates the northwestern side of this couloir. (3rd class) If you head mostly straight up, you'll come out just southeast of the true high point, the western summit. Turn right and walk on much easier terrain to finish. (It took us 35 minutes to reach the summit from the Broken Hand/Crestolita saddle.) For your return trip, drop north along the edge of the great couloir, delaying a drop directly into the couloir for as long as is reasonably possible. Then drop on into it and continue gingerly down whatever remains of the 600 foot gash until it opens up into the tundra above Cottonwood Lake. Intercept the trail from Cottonwood back to Broken Hand Pass and enjoy much firmer footing as you regain nearly 500 feet back to the pass.
2. If you're not doing Broken Hand Peak, then from the top of Broken Hand Pass, follow the trail down toward Cottonwood Lake and before reaching the lake, cross over the tundra and enter the great, north face couloir. Early season this could be a challenging snow climb requiring ice axe and crampons. If the snow has cleared out, then begin the arduous task of heading directly up the couloir on steep, very loose rubble and exit it as described above when you think you can easily reach more stable terrain. Alternately, you can also try staying out of the couloir by scrambling on the right side on a steep, rock rib with tundra, embedded rocks and rocky ledges. We would rate almost all of this route as high 2nd to 3rd class scrambling. Return by the same route. The rib may be more in the order of 4th class.
Depending on the route you choose, total elevation gain may vary from about 1,200 to 1,500 feet measuring from Broken Hand Pass. You'll only cover a mile or less. IN this description, we have sequenced Crestolita with UN 13,020 B so one way mileage and elevation gain are measured from the summit of UN 13,020 B and round-trip mileage and elevation gain assume completion of the sequence. We have let Broken Hand Peak be discussed as a stand alone summit, however, for the most energetic, it could also be included in this one-day sequence.
Additional BETA
Links to other information, routes & trip reports for this peak that may be helpful. -